
------------------------------------------------------------------------------------------------------------
A "Beary" Good Breakfast (aka The Peanut Butter Bear)
Tuesday, January 22, 2013
Toddlers are funny little creatures. They are at the age when they start to become more independent ("No, Mama. I wanna put my shoes on by myself!") and they start figuring out what they like and don't like ("I don't like strawberry yogurt. I like blueberry." Weird, you liked strawberry last week.) I'm fortunate to have a child who likes healthy food. I don't know if it's because we always offer the healthy stuff first and keep candy and other processed snacks to a minimum, or if he's just one of those unusual children who likes a variety of foods. I mean, come on. He's three and he loves olives. Green, black, Kalamata, doesn't matter.
Even though my son likes healthy food, there are times when I have to fight with him to eat something good when he really just wants some circus peanuts (yeah, he likes those too). I've found that when I make cool pictures with his food, though, he enjoys it more and he tends to eat a little more of it. Since that discovery, I have started to scour the internet for fun ideas. There is no shortage of ideas out there. The only problem is deciding what to try first!
Here is the first thing I tried. And Trey likes it so much we've made it 3 or 4 times in the last few weeks. It's easy and we already have everything we need in our kitchen.
A "BEARY" GOOD BREAKFAST (AKA THE PEANUT BUTTER BEAR)
What you need:
1 slice of bread
creamy peanut butter
a banana
raisins
orange wedges (optional)
chocolate chips (optional)
What you do:
Spread some peanut butter onto one side of the bread. Place the bread on a plate. I prefer to place it with the rounded side on the bottom. You can decide which way you like it.
Next, peel your banana and cut it up into 1/4" to 1/2" slices. Place 2 banana slices on either side of the top side of the bread, where the head is and place one banana slice in the center of the bread. Put 2 raisins above the banana slice in the center of the bread and put one raisin on top of that banana slice. You now have a bear! (See the pictures below.) To give your child an extra treat, you can use chocolate chips instead of raisins.
Now you can do one of two things. For the butterflies, you can cut the rest of your banana slices in half, or you can use orange wedges. Either way, you'll place 2 banana slice halves or 2 orange wedges next to each other, with the rounded sides touching. (See the pictures below.) Put as many as you want on the plate. You could even do a little of both! Just have fun with it. You little one will love it. Sometimes Trey will even ask for more butterflies after he has eaten everything.
.jpg) With banana butterflies  |
| With orange wedge butterflies and chocolate chips, instead of raisins |
 |
| My little man LOVES his peanut butter bear |
------------------------------------------------------------------------------------------------------------
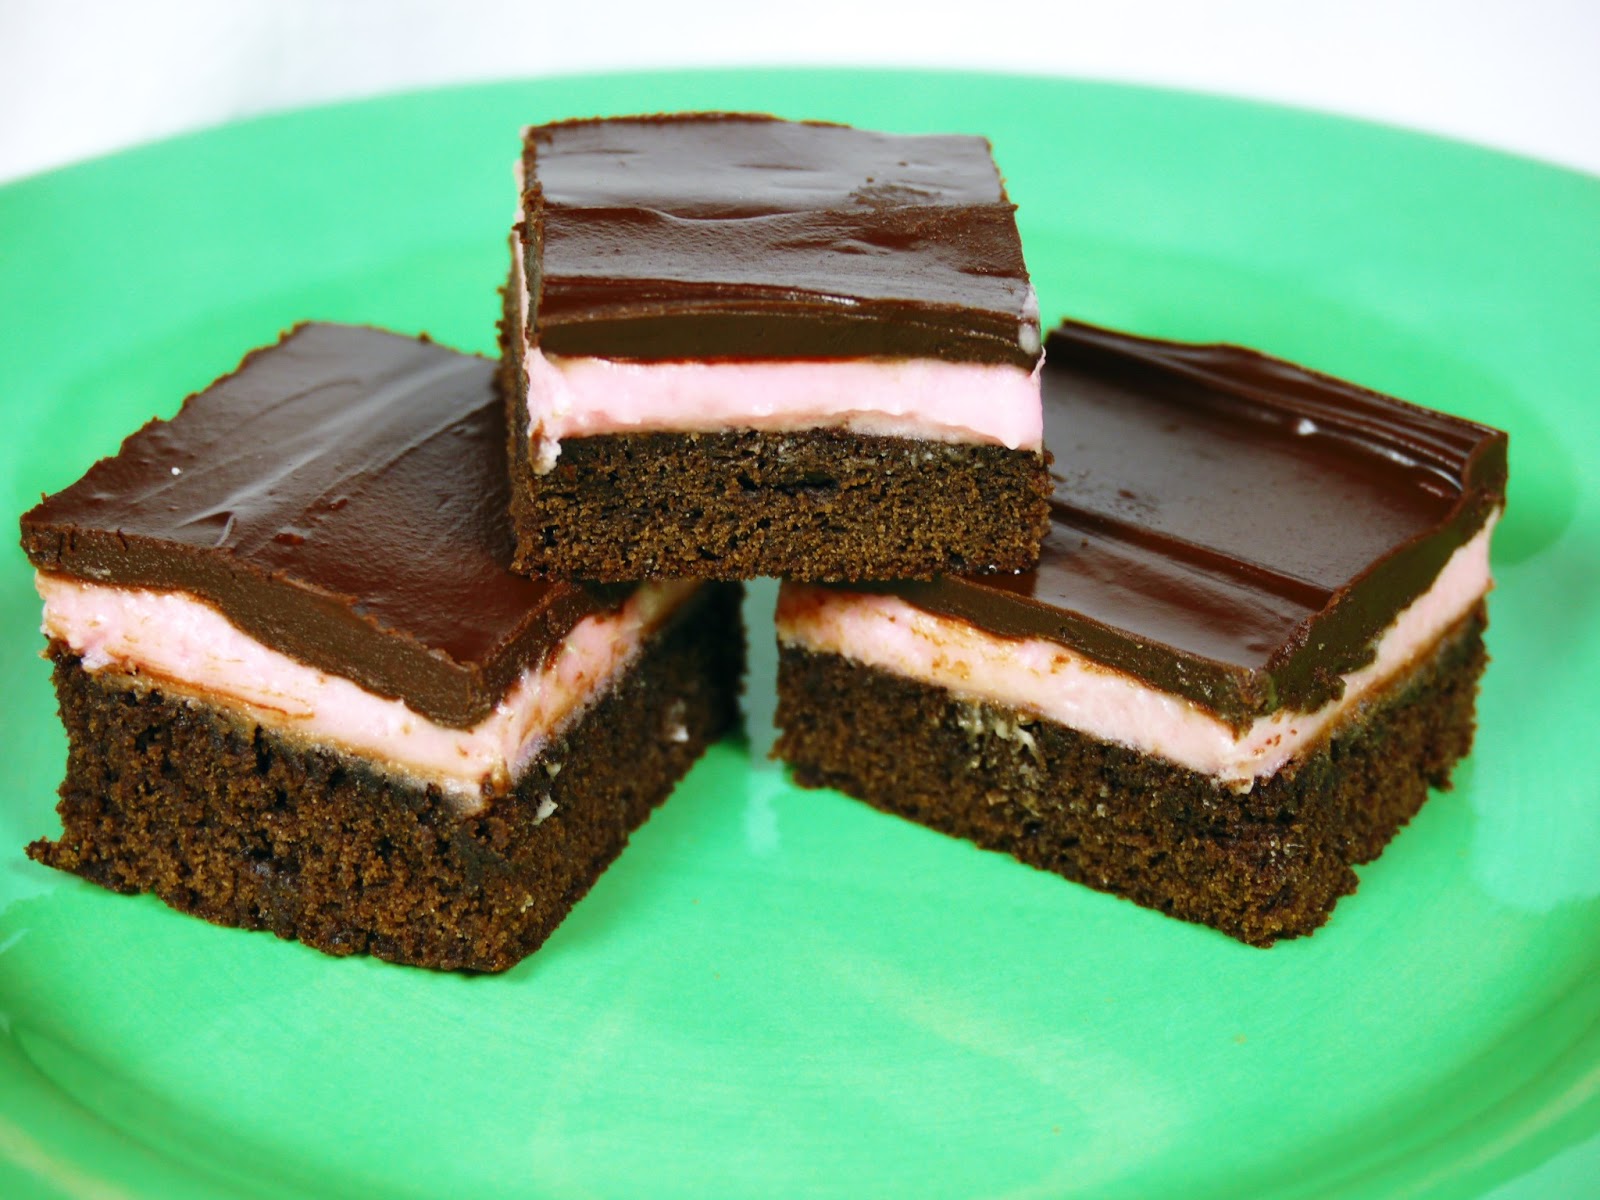
Chocolate Mint Brownies
Saturday, January 19, 2013
I remember going to Olive Garden one day with some friends. The hostess sat us at a booth & after a while I realized that my seat was directly beneath the ledge where the servers kept the bowl of Andes Mints. What's this? Yes, the mint chocolate powers that be were shining down on me that day. I know there are no "mint chocolate powers that be". But it was a beautiful day because of those little candies.
While we were there, I would occasionally reach my hand up to the bounteous bowl of chocolate-y/minty/creamy goodness and swipe a candy. This went on for some time before a server saw me. He smiled at me, but he had that look in his eyes that said if I took one more piece of candy, he'd swat my hand with that Parmesan cheese grater until I screamed "When!". So I surrendered and was just grateful for the brief time I had with those delicious candies, all wrapped in their shiny green and silver wrappers.
The point of the story? First, if you're ever seated that close to a bowl of Andes Mints while dining at Olive Garden, try to be a little more discreet than I was and maybe, just maybe, you won't get caught. Second, today's recipe is reminiscent of those glorious candies and I think you're going to have a hard time keeping friends and family from swiping them off of the plate.
You'll notice that the filling in these pictures is PINK. That's because I started to make them and then realized that I was out of green food coloring. I had red. Good enough. They taste exactly the same. And isn't that really all that matters?
On to the recipe...
CHOCOLATE MINT BROWNIES
What you need for the brownies:
 |
| Here is what you'll need |
Your favorite brownie mix (along with any oil, eggs, etc. the mix calls for)*
*If you have a favorite brownie recipe, by all means, use that instead. I just haven't found a homemade brownie recipe I like well enough yet.
What you need for the mint filling:
¼ cup softened butter
2½ cups confectioners' (powdered) sugar
1½ to 3 tablespoons milk
3 teaspoons peppermint extract
green food coloring
What you need for the topping:
3/4 cup semi-sweet chocolate chips
3 tablespoons butter
What you do:
FOR THE BROWNIES - Prepare and bake brownies according to package directions (or recipe directions, if you're using a recipe). After removing them from the oven, let them cool for at least one hour.


FOR THE FILLING - Cream butter and sugar.

Add milk, 1 tablespoon at a time, beating until smooth and spreadable.

Beat in the peppermint extract and food coloring.


Frost the cooled brownies and chill for 1 hour.

FOR THE TOPPING - Melt the semi-sweet chocolate chips with the butter in the microwave until the chocolate melts, stirring every 30 seconds.

Then stir until smooth.

Pour chocolate mixture over the mint filling and smooth it with a knife.

Refrigerate for 45 minutes or until the coating hardens.
Bring brownies to room temperature and cut into 16 or 32 pieces. I usually cut them into 32 pieces because they're pretty rich and sweet. Plus, you get to share with more people.
I made a batch of these and sent about half of them with my husband to share with his co-workers. They were a HUGE hit. I brought the other half to my office to share with my 17 female co-workers and they disappeared.
More recently, I made a batch to bring to my in-laws' house because they were having a bunch of people over for dinner (which was the giant pot of chili I made for the last recipe post I did). One of the guests couldn't get enough of these brownies. In fact, he ate so many of them, he was sick the next day. The moral of the story? Know when to say "when". And "enjoy responsibly".
-----------------------------------------------------------------------------------------------------------
Lisa's Chili
Sunday, January 6, 2013
Chili is a funny thing. There are some really good recipes and there are some really horrible ones. I've had both.
One year, the people in the office I work in decided to do a fundraiser. I don't remember what the fundraiser was for now because it was quite a while back. We were going to sell bowls of chili with all the "fixins". In order to figure out which chili recipe we were going to use, we had a little chili cook-off inside of the office. Participants brought their chili along with the recipe. Then each one was given a number so we didn't know who had made the chili. Everyone in the office tasted the different chilis (there were about 10 of them) and wrote down the number of the one they like the best. There were some with beans and some without. There was even one that tasted...unusual. We found out later that that one contained a little chocolate (a recipe submitted by the "Yankee" relative of a co-worker).
In the end, we chose the chili submitted by Lisa. It was good all around. It had beans, but wasn't overwhelmed with them. And the fundraiser, of course, was a success.
Since that day, I have used Lisa's recipe as my go-to chili recipe. Even my picky dad really likes this chili. I had to give my mom the recipe. There's always a sense of pride and "wow this is awesome" when your dad likes your chili (or any food) over your mom's, especially when said mom is an amazing cook.
When I was growing up we ate chili in a bowl with a little cheese on top, maybe some pickled jalapenos and diced onion, with some saltine crackers on the side. Occasionally, we ate it on top of Fritos (topped with cheese, of course) for Frito Pie. Living in Texas, I learned that some people even eat it over rice. However you like to eat your chili, you can't go wrong with this recipe. Adjust the seasonings/spiciness to your preference. And make a giant pot of it to share with friends or family. Then sit back and watch it disappear.
LISA'S CHILI
Recipe courtesy Lisa Matthews
What You Need:
2 lbs ground beef (even ground chicken or turkey works great in this)
1 package original chili seasoning
1 package hot chili seasoning (if you don't like it spicy you can use 2 packages of the original seasoning mix)
28 oz can Rotel Mild diced tomatoes
15 oz can Ranch Style beans
two 14.5 oz cans petite diced tomatoes
two 8 oz cans tomato sauce
2 cups hot water
steak seasoning (to taste)
2½ tbsp chili powder
What You Do:
Brown ground meat in a large pot.

Drain grease. Season with steak seasoning (to taste.)
Blend Rotel and diced tomatoes in a blender for 5 seconds. Add blended tomatoes, tomato sauce, both chili packets, beans, chili powder, and hot water to drained meat.

Heat until it simmers, stirring constantly. Cook on low for 30 minutes, stirring occasionally.
Optional: Add more chili powder, water, salt or pepper (to taste)
Serve with Fritos, rice, cheese, jalapenos, diced onions, crackers, sour cream, or whatever crazy thing you like to eat chili with.

-----------------------------------------------------------------------------------------------------------
Friday, December 28, 2012
I was eleven years old and one of the classes I was in took a field trip to the Texas Renaissance Festival one year. My mom volunteered to chaperon. No! Why?? I got along with my mom, but I was at that adorable age when your parents start deliberately doing things to embarrass you in front of your friends and peers. Or that's how it felt at the glorious age of eleven. And my mom has never been one of those quiet, soft-spoken mothers. No, she was silly and liked to have fun with kids. She's always liked kids. When I was five it was a great thing. It was fun. At the age of eleven, though, that isn't how you want your mom to be when you're around others your age.
I remember being on the bus with a bunch of other kids, most of whom I didn't know because they came from other schools. A group of girls behind us started singing some song that included the well-known blues tune "da-NAA-na-na". And my silly, kid-loving mother jumped in and started singing "Bad to the Bone". I nearly slithered out of my seat onto the floor. The girls laughed. I don't know if they thought she was funny or what. I didn't care. I just wanted to disappear. Later, she broke out some snacks. They were these little things she called "Barbie Cups". I hadn't had them in years. And she didn't keep them to herself. Oh no. She started sharing them with the kids sitting near us on the bus. And in my prepubescent brain, it was just too much. I was mortified.
I got through that trip physically unscathed. And I never saw most of those other kids again, so I got over the emotional "trauma" fairly quickly. There were way too many other things to get embarrassed over in the months and years to follow.
BARBECUE CUPS (BARBIE CUPS)
Makes 12 servings (1 "cup" each)
What You Need:
1 lb. ground beef (or ground chicken or turkey)
¼ c. finely chopped onion
1 c. barbecue sauce
2¼ c. biscuit mix (like Bisquick)
1 c. shredded Cheddar
2/3 c. milk
What You Do:
Preheat oven to 450º. Spray 12 regular size muffin cups with cooking spray. Or you can line them with paper or silicone cups.
 |
| My mom actually bought these silicone cups for me. |
In a 10" skillet, cook meat (I used ground chicken this time) and onion over medium-high heat for 5-7 minutes, stirring occasionally, until thoroughly cooked.

Drain excess grease (if there is any). Stir in barbecue sauce; cook until mixture just begins to bubble. Turn off heat and set aside.

In a medium bowl, stir biscuit mix, ½ cup of the cheese, and all of the milk until a soft dough forms.

Spoon about 2 tablespoons of dough into each muffin cup. Press dough into the bottom and onto the sides of each cup.

Spoon 2 tablespoons of the meat mixture into each cup.

Bake 8-10 minutes or until top edges of cups are golden brown. Sprinkle each with remaining cheese. You'll notice that I added my cheese before I baked the cups. I forgot to bake the cups first (oops). They turned out fine. So don't worry if you add the cheese before baking. It's all good.

Let it stand for 5 minutes, then remove them from the pan. Enjoy! Betcha can't eat just one.

When I was a teenager, I found that my friends actually liked it when my mom went places with us and did things with us. She could be just as crazy, weird, and gross as we could be and they loved it. She was still the adult, but she knew how to have fun. Over time, I learned to appreciate that. And today, 24 years after that über-embarrassing day, my mom is my best female friend. I can tell her just about anything. She's seen me at my absolute worst and still, somehow, she loves me and accepts me. Maybe it's because I'm as weird as she is. Oh boy, my son is in serious trouble in the years and field trips to come.
Now go out there and embarrass the mess out of your kids! It's only because you love them. :)
------------------------------------------------------------------------------------------------------------
Acorn Squash Soup
Tuesday, December 18, 2012
 My son turned 3 years old today. As I thought about the day he was born, my heart swelled so much that I thought my chest was going to burst open. I know it sounds cliche, but that's exactly how it felt. I had a strange pregnancy. I was sick the whole 9 months (not just a few), I only gained 7 pounds through the whole thing, and I had no cravings. Oh, and my son was 10 pounds, 7 ounces at birth. Yep. You read that correctly. Ten pounds.
My feelings of happiness and love then turned to a slight sadness. He's growing up so fast and he's learning so much. Before I know it, he'll be in school, then he'll be driving, then dating, getting married, and making me a grandmother. Is there a pause button on this thing?
So I'm being a bit dramatic. But those thoughts do run around in my crazy head from time to time. And when I get a little down, I want comfort food. Soup is a great comfort food, especially when the weather is cooler. ("Cooler" is just about all we seem to get for our Louisiana winters.) One soup I have made several times already this year is Acorn Squash Soup. It's full of good-for-you veggies and it's filling. I love it. I hope you like it too.
ACORN SQUASH SOUP
Makes about 8 servings
What You Need:
1 medium or large acorn squash
Cooking spray or 1 tablespoon oil of your choice (canola, grapeseed, olive oil, etc.)
1 large onion, finely chopped
4 garlic cloves, minced
1 teaspoon grated ginger
2 to 3 carrots, peeled and shredded
1 medium zucchini, chopped
4 cups water or vegetable broth
Salt, black pepper, and cayenne pepper to taste
1 cup milk (instead of regular milk, you can use half and half to make it extra rich and creamy or unsweetened, plain almond milk to cut down on fat)
What You Do:
Preheat oven to 400º.
Take a knife or a metal skewer and poke holes all over the squash. Put the squash in the microwave and cook it on high for about 2 minutes. This will soften it just a little to make it easier for you to cut it. These little boogers are pretty tough. After taking it out of the microwave, slice the squash in half lengthwise. Scoop out all of the seeds (you can save these to roast later if you want, or you can throw them away). Use a spoon to scoop out the stringy part that was attached to the seeds. I personally don't like the stringy part in my soup. Then place some foil on the bottom of a 13" x 9" pan and spray it with cooking spray. Place the squash, flesh side down, onto the foil. Bake for 20 minutes and check for doneness. You want the squash to be soft enough to scoop out with a spoon. If it isn't soft enough, put it back in the oven, checking on it every so often.
While the squash is roasting, peel, chop, mince, and shred the rest of the vegetables. You'll see in the picture that I didn't shred my carrots. I chopped them. They didn't get as soft as I would have liked when I cooked them. Now I shred them. Ah, Hindsight. You have such perfect vision.

Spray a nonstick skillet with cooking spray (or use 1 tablespoon oil). On medium heat, cook the onion for a minute. Add the minced garlic and the grated ginger, cooking only for another minute or two, just to get the onion soft. You don't want to overcook it. You can add some salt and black pepper to this mixture.

Add the carrots and zucchini to the onion mixture and cook over a low heat until they start to soften. Then dump them all into a soup pot. Add the water or vegetable broth. I used water because I didn't have vegetable broth. Trust me, it tastes great using plain water.

Cook on medium heat until the vegetables have softened. You can add more water or broth as it cooks if you feel it needs more.
When the squash has finished roasting and is soft enough to scoop out of its shell, remove it from the oven. You can either let it sit until it cools enough for you to be able to handle it, or you can do like I did and jump right in. (If you choose the latter, you run the risk of burning your fingers a little. Again, hindsight...) When you feel you're ready to handle the squash, use a spoon to scoop out the soft flesh and add it to the vegetables that are cooking in the soup pot. If your squash isn't completely soft, adding it to the soup pot will allow it to continue to soften.

Once the vegetables in the pot are completely soft, turn off the heat. Use an immersion blender to puree the vegetables. If you don't have an immersion blender, you can dump everything into a blender and puree it all in there. You may have to do it in batches, depending on the size of your blender. I love my immersion blender.

Add salt. black pepper, and cayenne pepper to taste, mixing after each addition, until you have the seasonings adjusted to your preferences. Then add the milk and mix it well. Taste the soup again and adjust the seasonings if needed.

------------------------------------------------------------------------------------------------------------
Pecan-Lemon Shortbread Cookies
Saturday, December 15, 2012
 Who doesn't love cookies? I'm sure there are some people out there who don't. We call them crazy cookie haters. Well, I do. Cookies are little disks of heaven. And I don't care if they contain chocolate or not. Cookies are crazy-good. And they're so darn portable. You can take them anywhere. Except to the movie theater, unless you hide them in your massive purse. Not that I've ever done that...
I was in a baking mood and decided to bake some cookies. Not just any cookies. I was in the mood for something simple, yet so good that a person wouldn't be able to stop after just one. Then I remembered the cookbook that someone bought for me when I was 24 years old. I'd moved out of my parents' home in Louisiana and moved to Texas for a job. I had my first place by myself and some friends threw a housewarming party for me because I had absolutely nothing.

The cookbook is from Williams-Sonoma called "Cookies and Biscotti". Inside is a wonderful recipe for Pecan-Lemon Shortbread Hearts. I've only made them once before, but I remembered how great they were. So this is what I made. I cut one cookie into a heart to give to my hubby (aw!) and the rest I cut into circles. I gave some away to my parents and a few to some friends. My mom loved them and so did my husband. I know he loved them because after he ate the cookies I had set aside for us in a plastic container, he opened up some of the cute little goodie bags I had made up to give away to more friends. Note to Self: Next time, hide extra cookies that are to be given away to friends and family.
I checked the Williams-Sonoma website and it looks like they no longer have this cookbook available there. However, I did find some on Amazon for a decent price. If you like this recipe, you may like some of the others in the book.
Here's the recipe. Make them, enjoy them, and share them with friends. Just make sure you share them before your husband eats them all.
PECAN-LEMON SHORTBREAD COOKIES
From the Williams-Sonoma Cookies and Biscotti cookbook
Yields about 2 dozen 3-inch cookies
What You Need:
1½ cups all-purpose flour
½ cup granulated sugar
¼ cup cornstarch
1 tablespoon plus 1 teaspoon grated lemon zest
¼ teaspoon salt
¾ cup unsalted butter, chilled, cut into ½-inch pieces
½ teaspoon vanilla extract
1 cup pecans
What You Do:
Preheat an oven to 350° F.
In a food processor fitted with the metal blade, combine the flour, granulated sugar, cornstarch, lemon zest and salt.

Process briefly until well mixed. Add the butter and vanilla and, using rapid off-on pulses, cut in until the mixture resembles a fine meal. Add the pecans and process until finely chopped.

Transfer the mixture to a large sheet of waxed paper and gather together into a flat disk. Top with a second sheet of waxed paper. Roll out the dough ¼ inch thick (or slightly thinner if you'd rather thinner cookies).

Using a 3-inch or 1½ inch cutter, cut out cookies.

Transfer to ungreased baking sheets, spacing them ½ inch apart. Gather up the scraps, roll out again and cut out additional cookies.

Bake until just beginning to color, about 20 minutes.* Transfer the baking sheets to wire cooling racks and let cool for 5 minutes. Transfer the cookies from the baking sheet to the racks to cool completely. Store in an airtight container at room temperature for up to 1 week.
*NOTE FROM SUMMER: While they are baking, just keep an eye on them. It may not take the whole 20 minutes for them to bake. They will burn quickly if they're in the oven too long.
------------------------------------------------------------------------------------------------------------
Crock Pot Santa Fe Chicken
Sunday, December 9, 2012

Fortunately, dinner was a breeze and I didn't have to spend a lot of time doing prep work or standing over the stove. I picked out a recipe that would be cooked in the slow cooker and it allowed me to get started on that pile of dishes before we ran out of things to eat on. The recipe turned out great and I will definitely be making it again. My husband said it had a great flavor to it. It has beans in it. He doesn't like beans. He liked this. Winning!
I love food blogs. When I want to try something different and get a quirky story alongside a recipe, a good food blog is the place to be. Three of my favorites at the moment are: The Pioneer Woman (www.thepioneerwoman.com/cooking), Joy the Baker (www.joythebaker.com), and Gina over at Skinny Taste (www.skinnytaste.com). Gina's website is exactly where I got the recipe for the dinner I made tonight. Gina has great recipes and all of them are "skinnied" down. If you're following Weight Watchers, she even has the Points (old) and PointsPlus (new) values listed for each serving. As I am faithfully jumping on and off of the Weight Watchers wagon, Skinny Taste has been a great help to me when I get tired of just baking a chicken and steaming some veggies for dinner.
Try this recipe. And be sure to go over to Skinny Taste and check out Gina's other recipes. You will not be disappointed. If you are, you can blame me. But I don't think that's going to happen.
CROCK POT SANTA FE CHICKEN
Taken from www.skinnytaste.com.
What You Need:
 |
| This recipe left me with ½ lb. chicken to use on another dish |
14.4 oz. fat free chicken broth
15 oz. can black beans, drained and rinsed
8 oz. frozen corn
14.4 oz. can diced tomatoes with mild green chilies
¼ cup chopped fresh cilantro
3 scallions, chopped
1 tsp. garlic powder
1 tsp. onion powder
1 tsp. cumin
1 tsp. cayenne pepper (more, if you like it spicy)
salt to taste
Cooked rice or tortillas
Cooked rice or tortillas
What You Do:
Combine chicken broth, beans, corn, tomatoes, cilantro, scallions, garlic powder, onion powder, cumin, cayenne pepper, and salt in the slow cooker.

Season the chicken breasts with salt and lay them on top of the other ingredients.

Cook on low for 10 hours, or on high for 6 hours. Thirty minutes before serving, remove the chicken and shred.

Return shredded chicken to the slow cooker and stir in with the rest of the ingredients. Adjust salt and seasoning to taste. Serve over rice or tortillas and add your favorite toppings.
------------------------------------------------------------------------------------------------------------
Here are just a few pictures I've taken of
some of the recipes that will be posted
soon.
Here are just a few pictures I've taken of
some of the recipes that will be posted
soon.
 |
| Veggie Sandwich |
The idea is to take some of the
complication out of written recipes, making
them easier to follow and provide better
progress markers than traditional written
recipes.
And more importantly, to make
them fun!
complication out of written recipes, making
them easier to follow and provide better
progress markers than traditional written
recipes.
And more importantly, to make
them fun!
 |
| Lemon Herb Chicken with Orange Rice |
 |
| Mint Chocolate Brownies(Andes Brownies) |
 |
| Orange Overload Glazed Chocolate Cake |
 |
| Zucchini Hummus |
 |
| Loaded Baked Sweet Potatoes |
 |
| Orange Marmalade |
 |
Awesome I've been experimenting too. in fact the Brazilian rice I made two days ago had onions in it. oops Kurt hates onions. LOL
ReplyDeletecan't wait to see more.
DeeDee
Thanks DeeDee! Glad you stopped by.
DeleteAwesome, looks super delicious
ReplyDeleteThanks, Mat. We really liked it. Stay tuned for more!
ReplyDeleteLooking forward to the Andes brownie recipe :D
ReplyDeleteOh yeah, they're really good. Everytime I make them for others, they disappear quickly. My boss has told me never to bring them to work again. (He couldn't stop eating them!) That recipe will be posted very soon. Thanks for joining and for leaving your comment. I hope you enjoy the blog.
Delete